Drywall Installation Guide: A Comprehensive Overview
Numerous online resources and downloadable PDFs offer detailed drywall installation guidance‚ supporting both DIY enthusiasts and professionals with comprehensive instructions and visual aids.
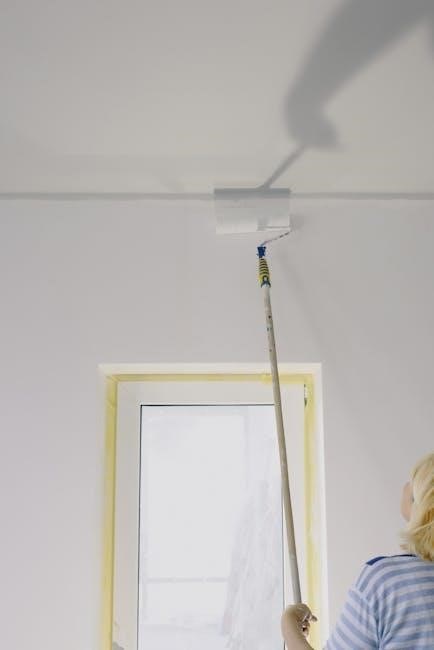
BEAM Consolidated’s video tutorial expertly demonstrates drywall installation‚ specifically focusing on incorporating a door opening into the process for seamless integration.
A 2021 guide provides a thorough DIY approach to successful drywall installation‚ covering essential basics for effective home renovation projects and achieving professional results.
Jeff Thorman’s tutorial offers a complete A-to-Z guide to drywall installation‚ complemented by a beginner’s taping guide for achieving smooth‚ flawless wall finishes.

A 2017 video series is designed to equip homeowners with the necessary skills for drywall projects‚ covering all aspects of the process from start to finish.
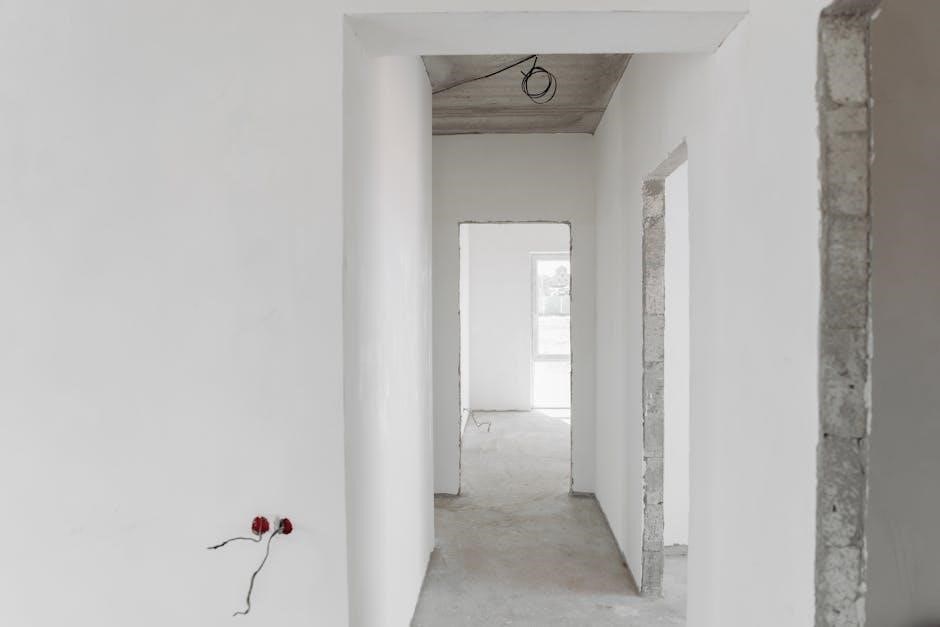
Embarking on a drywall project transforms a framed structure into a finished living space‚ but requires careful planning and execution. Comprehensive guides and PDFs are invaluable resources‚ offering step-by-step instructions for both beginners and experienced renovators.
These resources detail everything from material selection and tool usage to hanging‚ taping‚ and finishing techniques. Understanding the process‚ as outlined in available guides‚ minimizes errors and ensures a professional-looking result. Mastering drywall installation empowers homeowners to tackle renovations confidently‚ saving on labor costs and achieving personalized interiors.
Available PDFs often include visual aids‚ like diagrams and photos‚ to clarify complex steps‚ making the process more accessible. Successfully completing a drywall project requires patience‚ precision‚ and a solid understanding of the fundamentals‚ all readily available through dedicated installation guides.
Understanding Drywall Types
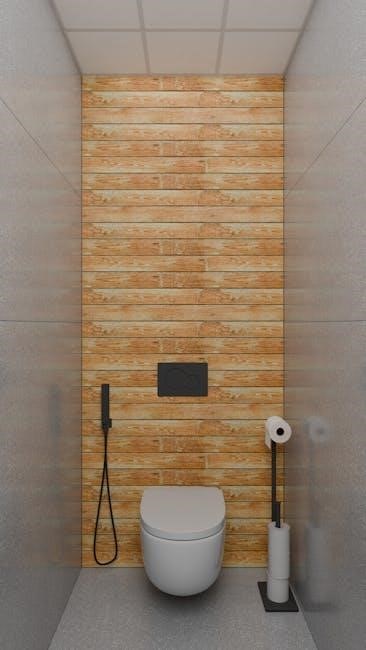
Drywall isn’t one-size-fits-all; various types cater to specific needs and applications. Installation guides and PDFs detail these distinctions‚ helping you select the appropriate material for your project. Standard drywall is suitable for general use‚ while moisture-resistant (green board) excels in bathrooms and kitchens.
Fire-resistant (Type X) drywall provides enhanced safety in critical areas‚ and soundproof drywall minimizes noise transmission. PDF resources often compare thicknesses – 1/2 inch is common for walls‚ while 5/8 inch offers greater durability. Choosing the right drywall impacts performance‚ cost‚ and long-term satisfaction.
Tools and Materials Needed
Comprehensive drywall installation PDFs emphasize a well-equipped toolkit for success. Essential tools include a drywall knife‚ tape measure‚ T-square‚ screw gun‚ and dust mask. Materials encompass drywall sheets‚ joint compound (mud)‚ drywall tape‚ and fasteners like screws or nails.
Safety gear‚ such as gloves and eye protection‚ is crucial. PDF guides often provide detailed material lists based on project size. Having the right tools streamlines the process‚ ensuring accurate cuts‚ secure hanging‚ and a professional finish‚ ultimately saving time and effort.
Essential Tools for Cutting and Hanging
Drywall installation PDFs consistently highlight key cutting tools: a utility knife for scoring‚ a drywall saw for detailed cuts‚ and a T-square for accuracy. For hanging‚ a screw gun with a depth-setting clutch is vital‚ alongside a hawk and taping knife for mud application.
PDF guides stress the importance of sharp blades for clean cuts and proper screw length to avoid tearing the paper face. Having these tools ensures efficient drywall handling‚ secure attachment‚ and a smooth foundation for finishing.
Fasteners: Screws vs. Nails
Drywall installation PDFs overwhelmingly recommend screws over nails for superior holding power and reduced popping. Screws allow for precise depth control‚ preventing damage to the drywall paper face‚ a common issue with hammering nails.
Guides detail using specifically designed drywall screws‚ noting their bugle head minimizes tearing. While nails were historically used‚ screws provide a more secure and lasting attachment‚ crucial for long-term wall stability and a professional finish.
Preparing the Framing for Drywall
Drywall installation PDFs emphasize meticulous framing inspection before drywall application. Guides stress checking for compliance with building codes‚ ensuring proper stud spacing and structural integrity. Resources highlight the necessity of adding blocking between studs for secure drywall attachment‚ particularly at end joints.
PDFs detail adding support where drywall edges lack framing within four inches‚ preventing sagging and ensuring a solid surface. Checking corners and ceiling/wall joints is crucial for a level‚ professional result.
Inspecting Framing for Compliance
Drywall installation PDFs consistently prioritize a thorough framing inspection. Guides detail verifying stud spacing adheres to local building codes‚ typically 16 or 24 inches on center. Resources emphasize checking for warped‚ damaged‚ or improperly installed studs‚ as these compromise drywall support.
PDFs highlight the importance of plumb and square framing‚ ensuring a level and even drywall surface. Addressing any deficiencies before proceeding is crucial for a professional‚ long-lasting installation.
Adding Blocking and Support
Drywall installation PDFs stress the necessity of adding wood blocking between studs where drywall ends lack support within four inches‚ ensuring secure fastening; Guides recommend inspecting corners and ceiling/wall joints for adequate backing.
Resources detail measuring from ceiling ends to joist centers‚ adding blocking as needed. PDFs emphasize that proper blocking prevents nail pops and screw holes‚ contributing to a durable and professional drywall finish‚ enhancing long-term wall stability.
Measuring and Cutting Drywall
Drywall installation PDFs consistently highlight the importance of accurate measurements as a foundational step‚ advising to begin with precise calculations of height and length for optimal material usage. Guides emphasize careful planning to minimize waste.
Resources detail techniques for efficient cutting‚ ensuring clean lines and proper fit. PDFs often include diagrams illustrating cutting methods‚ promoting both safety and accuracy throughout the drywall installation process‚ leading to professional results.
Accurate Measurement Techniques
Drywall installation PDFs stress the necessity of measuring both wall height and length meticulously‚ advocating for double-checking all dimensions before cutting any material. Guides recommend accounting for any irregularities in the framing‚ like studs or obstructions.
Resources often detail how to measure from the ceiling to the middle of a joist‚ ensuring proper support. PDFs emphasize the importance of transferring measurements accurately to the drywall sheet‚ minimizing errors and waste during the installation process.
Safe and Efficient Cutting Methods
Drywall installation PDFs consistently highlight safety as paramount‚ recommending the use of dust masks and eye protection during cutting. Guides detail scoring and snapping techniques for straight cuts‚ minimizing crumbling and ensuring clean edges.
Resources often demonstrate using drywall saws or utility knives for more intricate cuts around openings. PDFs emphasize controlled pressure and a firm surface for accurate results‚ reducing waste and promoting efficient installation.
Hanging Drywall on Walls
Drywall installation PDFs emphasize proper lifting techniques to avoid strain and damage‚ often recommending two-person teams for larger sheets. Guides detail starting at a corner and utilizing screw spacing of approximately 12-16 inches on studs.
Resources highlight the importance of dimpling screws to prevent tearing the paper face‚ ensuring a secure hold. PDFs often illustrate staggered screw patterns for enhanced stability and minimizing potential cracking during finishing stages.
Proper Lifting and Positioning
Drywall installation PDFs consistently advise using a panel lift or assistance from a partner due to the weight and awkwardness of the sheets‚ preventing injury and damage. Guides detail lifting from the bottom edge‚ keeping the drywall as vertical as possible.
Resources emphasize carefully maneuvering sheets into place‚ avoiding impacts with framing or finished surfaces. PDFs often illustrate proper positioning‚ leaving a small gap (approximately 1/8 inch) at the floor for expansion and preventing buckling.
Screw Spacing and Techniques
Drywall installation PDFs universally recommend 12-inch screw spacing along studs and joists‚ reducing to 8 inches around edges and openings for added support and preventing cracking. Guides stress driving screws to achieve slight dimpling without breaking the paper face.
Resources detail using the correct screw length – typically 1 ¼ inch for ½-inch drywall – and avoiding overdriving‚ which weakens the hold. PDFs often illustrate proper screw patterns and techniques for optimal drywall adhesion and a smooth finish.
Hanging Drywall on Ceilings
Drywall installation PDFs emphasize ceiling installation requires more support due to gravity; guides recommend 16-inch joist spacing as standard‚ with blocking added for extra security. Resources detail lifting techniques‚ often suggesting using a drywall lift to manage weight and prevent sagging.
PDFs highlight staggering end joints for increased strength and minimizing visible seams. Instructions consistently advise securing drywall with appropriate screw lengths and spacing to prevent pull-through and ensure a level‚ stable ceiling surface.
Ceiling Installation Considerations
Drywall installation PDFs consistently stress the importance of adequate ceiling joist support‚ often recommending 16-inch on-center spacing‚ and adding blocking between joists for enhanced stability. Guides detail how to avoid sagging by utilizing proper screw placement and staggering drywall seams.
Resources emphasize the need for a drywall lift to manage the weight of ceiling boards‚ promoting safety and efficiency. PDFs also highlight the critical role of accurate measurements and secure fastening to prevent future issues like cracking or detachment.

Avoiding Sagging and Ensuring Support
Drywall installation PDFs repeatedly advise staggered seam placement to distribute weight and minimize the risk of sagging‚ particularly over longer spans. Guides recommend using adhesive in addition to screws for increased bonding and support‚ especially on ceilings.
Resources detail the necessity of proper screw spacing – typically 12 inches on center – and emphasize the importance of hitting joists for secure fastening. PDFs also suggest adding blocking between joists to provide intermediate support and prevent deflection.
Taping and Mudding Drywall
Drywall installation PDFs consistently highlight embedding tape within the first coat of mud as crucial for creating seamless joints‚ preventing cracks‚ and achieving a smooth finish. Guides detail various taping methods‚ including paper and mesh tape applications.
Resources emphasize applying thin‚ even coats of mud‚ feathering the edges to blend seamlessly with the surrounding drywall. PDFs often include detailed instructions on applying subsequent coats‚ sanding techniques‚ and achieving a level 5 finish.
Applying the First Coat of Mud
Drywall installation PDFs universally recommend applying the initial mud coat thinly and evenly‚ focusing on covering the embedded tape and screw/nail depressions. Guides stress feathering the edges outwards to create a gradual transition‚ minimizing visible ridges.
Resources often illustrate using a 6-inch taping knife for this stage‚ emphasizing consistent pressure and overlapping strokes. PDFs frequently advise against applying too much mud initially‚ as it increases sanding effort and potential imperfections.
Embedding Tape for Seamless Joints
Drywall installation PDFs consistently highlight the importance of fully embedding drywall tape within the first coat of mud‚ ensuring a strong and invisible joint. Guides detail applying mud over the tape‚ not just on top‚ using firm pressure to adhere it.
Resources often demonstrate using a 6-inch taping knife to press the tape into the mud‚ removing excess and creating a smooth‚ even surface. PDFs emphasize avoiding air bubbles or wrinkles under the tape for a flawless finish.
Sanding Drywall for a Smooth Finish
Drywall installation PDFs universally recommend starting with a medium-grit sandpaper (120-grit) to remove imperfections‚ then progressing to finer grits (150-220) for a polished surface. Guides stress sanding lightly and evenly to avoid damaging the paper face.
Resources emphasize dust control‚ suggesting using a vacuum with a HEPA filter and wearing a dust mask or respirator. PDFs often advise sanding in a circular motion and checking for imperfections with a bright light.
Choosing the Right Sanding Grit
Drywall installation PDFs consistently advise beginning with 120-grit sandpaper for initial smoothing‚ effectively addressing imperfections and tool marks. Guides then recommend transitioning to 150 or 180-grit for blending mud and preparing for primer.
Resources highlight that finer grits (220+) are best for lightly smoothing primed surfaces before painting. PDFs caution against using too coarse a grit‚ which can damage the drywall paper‚ and emphasize gradual progression for optimal results.
Dust Control and Safety Measures
Drywall installation PDFs universally stress the importance of respiratory protection – a properly fitted dust mask or respirator – during sanding. Guides recommend sealing the work area with plastic sheeting to contain dust and using a vacuum with a HEPA filter for cleanup.
Resources emphasize wearing eye protection and long sleeves. PDFs also advise wet-sanding techniques to minimize airborne particles and proper ventilation to further reduce dust exposure‚ safeguarding worker health.
Dealing with Corners and Edges
Drywall installation PDFs detail specific techniques for both inside and outside corners‚ often recommending metal corner bead for enhanced durability and a clean finish. Guides emphasize precise cutting and proper mud application for seamless integration.

Resources highlight the importance of feathering the mud beyond the corner bead‚ creating a smooth transition. PDFs also suggest using corner trowels for consistent application and achieving professional-looking results‚ minimizing imperfections.
Inside Corner Techniques
Drywall installation PDFs consistently recommend using metal corner bead for inside corners‚ providing a sturdy base and protecting against damage. Guides detail applying a generous layer of mud over the bead‚ ensuring full coverage and adhesion.
Resources emphasize feathering the mud outwards‚ creating a smooth transition onto the adjacent drywall panels. PDFs often illustrate using a 4-inch taping knife for initial application‚ followed by wider knives for subsequent coats‚ achieving a seamless finish.
Outside Corner Techniques
Drywall installation PDFs frequently advise utilizing metal corner bead for outside corners‚ ensuring durability and a clean‚ defined edge. Guides demonstrate securing the bead with fasteners‚ maintaining consistent spacing for optimal hold.
Resources highlight applying multiple thin coats of joint compound‚ embedding the paper tape within each layer for strength and a smooth surface. PDFs often illustrate using a corner trowel to create sharp‚ even lines‚ minimizing imperfections and achieving a professional look.
Installing Drywall Around Openings (Doors & Windows)
Drywall installation PDFs emphasize precise cutting around door and window openings‚ recommending careful measurements and utilizing appropriate cutting tools for clean lines. Guides often detail reinforcing these openings with additional framing‚ providing solid support for the drywall edges.
Resources illustrate techniques for creating snug fits‚ minimizing gaps‚ and ensuring a secure attachment. PDFs frequently advise leaving a small reveal for trim‚ accommodating slight inaccuracies and facilitating a professional finish.
Precise Cutting for Openings
Drywall installation PDFs consistently highlight the importance of accurate measurements when cutting around openings‚ advocating for transferring dimensions directly onto the drywall sheet. Guides recommend using a sharp utility knife and a straight edge for initial scoring‚ followed by snapping and cleanly cutting the back paper.
Resources often demonstrate techniques for creating slightly undersized openings‚ allowing for fine adjustments during fitting. PDFs emphasize safety‚ advising careful handling of sharp tools and wearing appropriate protective gear during the cutting process.
Reinforcing Openings with Framing
Drywall installation PDFs stress the necessity of robust framing around door and window openings to provide secure drywall attachment and prevent future damage. Guides detail adding wood backing wherever drywall edges lack support within four inches of framing members.
Resources emphasize checking corners and ceiling/wall joints for adequate support‚ recommending measuring from the ceiling end to the joist’s midpoint. PDFs illustrate proper fastener placement to ensure a strong‚ lasting connection between the drywall and the framing structure.
Addressing Common Drywall Issues
Drywall installation PDFs frequently dedicate sections to troubleshooting typical problems encountered post-installation. Guides detail how to repair nail pops and screw holes‚ often recommending a simple mudding and sanding process for seamless fixes.
Resources also cover addressing cracks in drywall‚ suggesting techniques like re-taping joints or applying joint compound to restore wall integrity. PDFs emphasize prompt attention to minor repairs to prevent escalation and maintain a smooth‚ aesthetically pleasing finish.
Repairing Nail Pops and Screw Holes
Drywall installation PDFs consistently highlight nail pops and screw holes as common issues. Guides recommend gently hammering protruding nails back in‚ then covering with joint compound. For screw holes‚ a similar approach applies – slightly recess the screw and apply compound.
PDFs emphasize sanding the patched areas smooth after drying‚ ensuring a seamless blend with the surrounding drywall. Resources often suggest multiple thin coats of compound for optimal results‚ preventing visible imperfections and maintaining a professional finish.
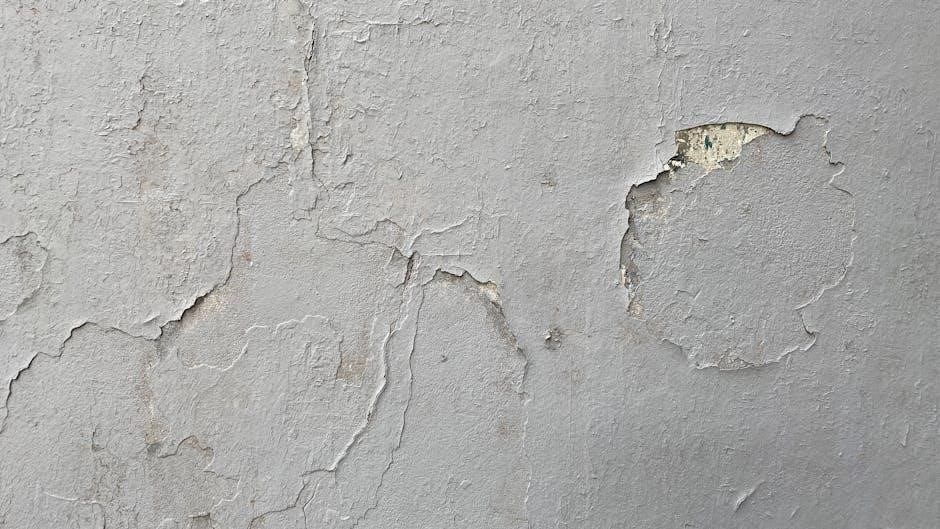
Fixing Cracks in Drywall
Drywall installation PDFs detail crack repair based on severity. Guides advise widening hairline cracks slightly with a utility knife to create a better surface for patching. For larger cracks‚ mesh tape is recommended‚ applied over the crack before applying joint compound.
Resources stress applying multiple thin coats of compound‚ allowing each to dry completely before sanding. PDFs often include diagrams illustrating proper taping and mudding techniques‚ ensuring a smooth‚ invisible repair and preventing future cracking.
Drywall Installation Safety Precautions
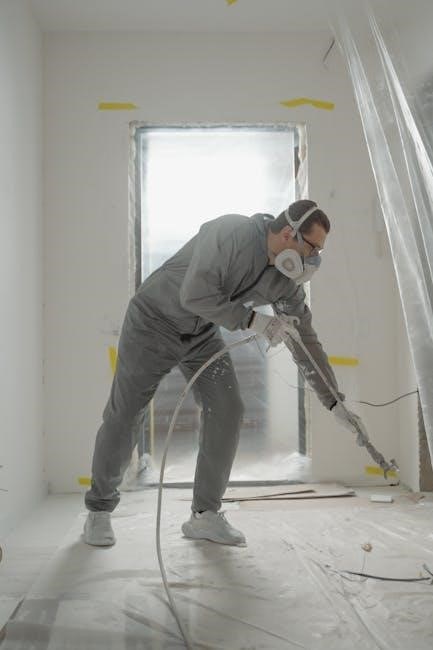
Drywall installation guide PDFs consistently emphasize the use of Personal Protective Equipment (PPE)‚ including safety glasses‚ dust masks‚ and gloves‚ to protect against dust and debris. Guides warn of potential electrical hazards‚ stressing the importance of locating and avoiding wiring before cutting into walls.
PDFs detail safe lifting techniques for heavy drywall sheets‚ recommending assistance to prevent strain or injury. Resources also highlight the need for proper ventilation during sanding to minimize dust inhalation and maintain a safe working environment.
Personal Protective Equipment (PPE)
Drywall installation guide PDFs universally recommend wearing safety glasses to shield eyes from airborne drywall dust and debris during cutting and sanding. Guides strongly advise using a dust mask or respirator to prevent inhalation of harmful particles‚ protecting respiratory health.
PDFs also suggest wearing gloves to protect hands from abrasions and cuts caused by drywall edges and screws. Proper attire‚ like long sleeves‚ is often mentioned for skin protection‚ ensuring a safer working experience.
Avoiding Electrical Hazards
Drywall installation guide PDFs consistently emphasize the critical importance of de-energizing circuits before cutting into walls or ceilings‚ preventing potential electrocution. Guides advise using a non-contact voltage tester to confirm power is off before commencing work near electrical wiring.
PDFs also caution against driving screws or nails into areas where electrical lines might be concealed‚ recommending careful inspection and‚ if unsure‚ consulting a qualified electrician for safe practices.
Cost Estimation for Drywall Installation
Drywall installation guide PDFs highlight that material costs encompass drywall sheets‚ joint compound‚ tape‚ screws‚ and primer‚ varying based on square footage and drywall type. PDFs detail labor costs differing significantly between DIY projects and professional installation.
Guides suggest obtaining multiple quotes from contractors‚ factoring in per-sheet or per-hour rates‚ and considering potential additional expenses for repairs or complex installations to create a realistic budget.
Material Costs Breakdown
Drywall installation guide PDFs emphasize that material expenses include the cost of drywall sheets themselves‚ varying by thickness and size‚ alongside joint compound for seams and screw/nail fasteners. PDFs also detail the need for paper or mesh tape‚ primer for surface preparation‚ and potentially corner bead.
Guides suggest budgeting for tools if undertaking a DIY project‚ like a drywall knife‚ saw‚ and sanding block‚ adding to the overall material investment. Accurate square footage calculations are crucial for precise cost estimation.
Labor Costs (DIY vs. Professional)
Drywall installation guide PDFs highlight a significant cost difference between DIY and professional installation. PDFs indicate DIY saves on labor‚ but requires time‚ skill‚ and potential tool investment‚ while professional installation incurs hourly or per-sheet rates.
Guides suggest professional labor costs vary regionally‚ but typically range from $1.50 to $3.50 per square foot‚ encompassing hanging‚ taping‚ and mudding. PDFs emphasize that DIY can be cost-effective for smaller projects‚ but larger ones benefit from professional expertise.
Finding Reliable Drywall Installation PDFs
Drywall installation guide PDFs are readily available online from sources like building supply retailers and home improvement websites. PDFs from established companies‚ such as BEAM Consolidated‚ offer comprehensive‚ professionally-created tutorials.
Guides emphasize verifying PDF authenticity and update dates‚ as building codes and best practices evolve. PDFs should clearly state the author and publication date. Cross-referencing information with multiple sources ensures accuracy and completeness‚ providing a reliable resource for your project.
Online Resources and Downloads
Numerous websites host drywall installation guide PDFs‚ offering step-by-step instructions and visual aids. Resources like home improvement forums and manufacturer sites provide downloadable guides. BEAM Consolidated’s video tutorial is often accompanied by supporting PDF documentation.
DIY enthusiasts can find detailed guides on platforms like YouTube‚ often linking to downloadable resources. Always prioritize PDFs from reputable sources to ensure accuracy and safety throughout your drywall project.
Checking PDF Authenticity and Updates
Verify the source of any drywall installation guide PDF before use; prioritize manufacturer websites or established home improvement resources. Check publication dates to ensure the information reflects current building codes and best practices. Look for author credentials or affiliations to validate expertise.
Be cautious of outdated PDFs‚ as techniques and materials evolve. Cross-reference information with multiple sources to confirm accuracy and avoid potential errors during installation.
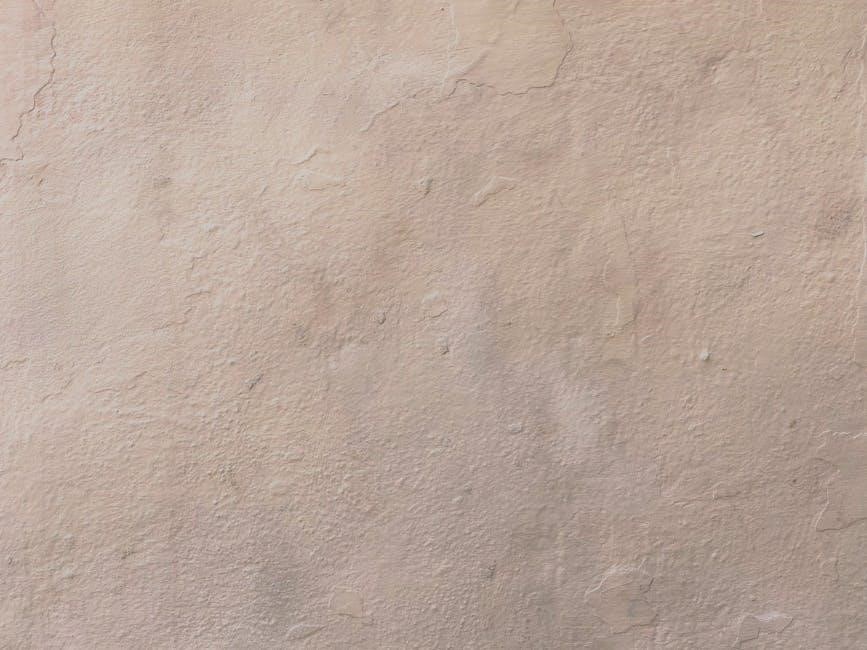
Drywall Finishing Techniques
PDF guides detail various texturing options‚ from smooth finishes to orange peel or knockdown‚ impacting the final aesthetic. Proper priming is crucial for paint adhesion and a uniform appearance‚ as highlighted in comprehensive guides. Mastering taping and mudding‚ often covered extensively‚ ensures seamless joint concealment.
Many resources demonstrate sanding techniques for achieving a level surface‚ preparing the drywall for paint. Understanding these finishing steps elevates the project beyond basic installation.
Texturing Options
PDF guides showcase diverse drywall textures‚ including smooth‚ orange peel‚ knockdown‚ and swirl patterns‚ influencing the room’s aesthetic. Application techniques vary‚ often detailed with visual aids within the guides. Texture selection impacts difficulty; smooth requires precise mudding‚ while heavier textures conceal imperfections.
Guides often advise practicing on scrap drywall before applying texture to walls. Choosing the right texture complements the room’s style and personal preference‚ enhancing the finished look.
Priming for Paint
PDF guides emphasize priming as crucial for paint adhesion and a uniform finish on newly installed drywall. Primer seals the porous surface‚ preventing uneven paint absorption and ensuring vibrant color. Selecting the correct primer—oil-based or latex—depends on the paint type and drywall conditions.
Guides detail application methods‚ recommending even coats with rollers or sprayers. Proper priming minimizes paint costs and enhances the longevity of the finished wall surface‚ creating a professional result.
Long-Term Drywall Maintenance
PDF resources highlight proactive maintenance to prevent drywall issues. Controlling moisture is paramount; guides advise addressing leaks promptly to avoid water damage and mold growth. Regular inspection for cracks or nail pops is recommended‚ enabling swift‚ minor repairs before they escalate.
Promptly addressing damage preserves drywall integrity and appearance. Guides detail simple repair techniques‚ extending the lifespan of the installation and maintaining a pristine interior finish for years to come.
Addressing Minor Repairs Promptly
PDF guides emphasize swift action for nail pops and screw holes‚ preventing further damage. Simple spackling techniques are detailed‚ offering easy DIY solutions for a seamless repair. Early crack intervention‚ using joint compound and tape‚ avoids larger structural issues.
Guides illustrate patching methods‚ ensuring a smooth‚ even surface ready for repainting. Prompt repairs maintain drywall integrity‚ preserving the aesthetic appeal and preventing costly‚ extensive renovations down the line.