Lennox Troubleshooting Manual: A Comprehensive Guide
Navigating Lennox HVAC systems requires a detailed understanding; this manual provides essential guidance for diagnosing and resolving common issues, ensuring optimal performance and longevity.
Understanding Lennox HVAC Systems
Lennox offers a broad spectrum of Heating, Ventilation, and Air Conditioning (HVAC) systems, each designed with specific features and complexities. Familiarizing yourself with the core components – furnaces, air conditioners, heat pumps, and air handlers – is crucial for effective troubleshooting. Modern Lennox units often incorporate digital displays that present error codes, serving as initial indicators of potential problems.
These systems utilize sophisticated controls and sensors to maintain desired temperatures and air quality. Understanding how these components interact is key. The Lennox service manuals, readily available online, provide detailed schematics and operational explanations. Recognizing the specific model number of your unit is paramount, as troubleshooting procedures can vary significantly between different series and generations. Proper diagnosis often requires a systematic approach, starting with basic checks and progressing to more complex component testing.

Common Lennox Error Codes and Their Meanings
Lennox HVAC systems utilize error codes displayed on the unit’s digital interface to pinpoint malfunctions. These codes aren’t universal; interpretation depends on the specific model. A frequently encountered code relates to flame sensor issues in gas furnaces, indicating a failure to detect a stable flame. Other common codes signal problems with the blower motor, refrigerant charge, or control board functionality.
The Lennox service manuals are invaluable resources for decoding these error messages. They provide detailed explanations of each code and suggest potential solutions. For example, a code related to the reversing valve in a heat pump might indicate a problem with the valve itself or associated wiring. Always consult the manual specific to your unit’s model number for accurate diagnosis and repair guidance. Ignoring error codes can lead to further damage and costly repairs.
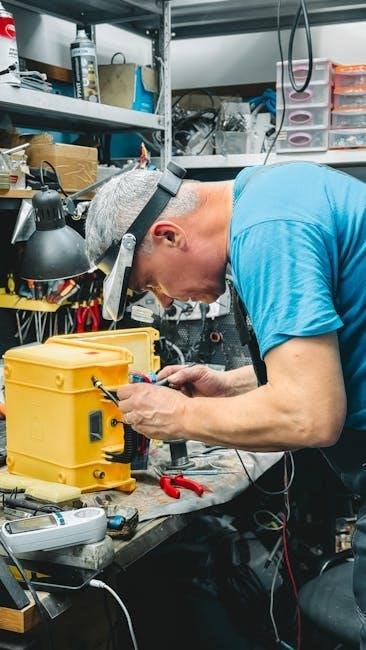
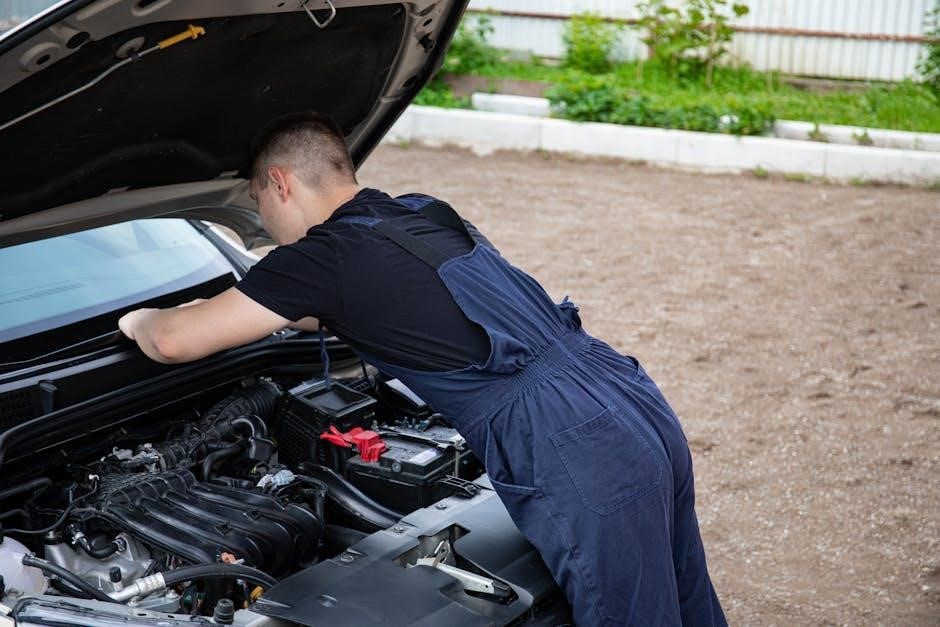
Lennox Furnace Troubleshooting
Addressing furnace issues begins with basic checks: ensure the power supply is stable, verifying no tripped breakers or blown fuses. If the furnace isn’t heating, confirm the thermostat is correctly set and functioning. For gas furnaces, a common problem involves the pilot light – though many modern units utilize electronic ignition. Troubleshooting often involves inspecting the flame sensor, which verifies a stable flame; a dirty or faulty sensor can prevent operation.
Malfunctions in the gas valve can also cause no-heat situations. A qualified technician should inspect this component. Remember, safety is paramount when dealing with gas appliances. Always prioritize professional assistance if you’re uncomfortable or unsure about any repair attempt. Regular maintenance, including filter changes, can prevent many furnace problems.

No Heat – Initial Checks
When your Lennox furnace fails to produce heat, begin with fundamental assessments. First, verify the thermostat is set to “Heat” and the desired temperature is higher than the room temperature. Next, inspect the furnace’s power switch – ensure it’s in the “On” position. Check the circuit breaker panel for tripped breakers dedicated to the furnace; reset any tripped breakers. Examine the furnace filter; a clogged filter restricts airflow, hindering performance.
Confirm the gas supply valve is open if you have a gas furnace. A simple visual inspection can reveal obvious issues like a disconnected wire or a blown fuse. These initial checks can often resolve minor problems quickly and safely before requiring more complex troubleshooting or professional intervention.
Pilot Light Issues (Gas Furnaces)
If your Lennox gas furnace’s pilot light is out, do not immediately attempt relighting. First, ensure the gas supply valve is open. Follow the furnace’s specific relighting instructions, typically found on a label near the gas valve. If the pilot light won’t stay lit after several attempts, a faulty thermocouple is a likely culprit – this safety device shuts off the gas if the pilot isn’t detected.
A dirty pilot orifice can also prevent proper ignition. However, cleaning or replacing these components requires expertise; improper handling can be dangerous. If you’re uncomfortable or unsuccessful, contact a qualified HVAC technician. Never bypass safety features or attempt repairs beyond your skill level.
Flame Sensor Problems
A malfunctioning flame sensor is a frequent cause of Lennox furnace issues, often resulting in a no-heat situation. The flame sensor verifies the presence of a flame; if it doesn’t detect one, the gas valve shuts off as a safety precaution. A dirty flame sensor is the most common problem – carbon buildup can insulate the sensor, preventing it from properly detecting the flame.
Carefully cleaning the flame sensor with fine steel wool or sandpaper can often resolve the issue. However, a consistently failing flame sensor, even after cleaning, indicates a potential internal fault requiring replacement. Always disconnect power to the furnace before attempting any maintenance. If unsure, consult a qualified HVAC technician for diagnosis and repair.
Gas Valve Malfunctions
A faulty gas valve can prevent the flow of gas to the burners, resulting in a no-heat condition in your Lennox furnace. Several factors can cause gas valve malfunctions, including a defective solenoid, a broken valve seat, or internal corrosion. Testing a gas valve requires specialized tools and knowledge, as working with gas lines is inherently dangerous.
Never attempt to repair a gas valve yourself; always contact a qualified HVAC technician. They will safely diagnose the issue, potentially testing the valve’s operation with a multimeter. If the valve is defective, it must be replaced by a professional to ensure safe and proper furnace operation. Ignoring a gas valve problem can lead to dangerous gas leaks.
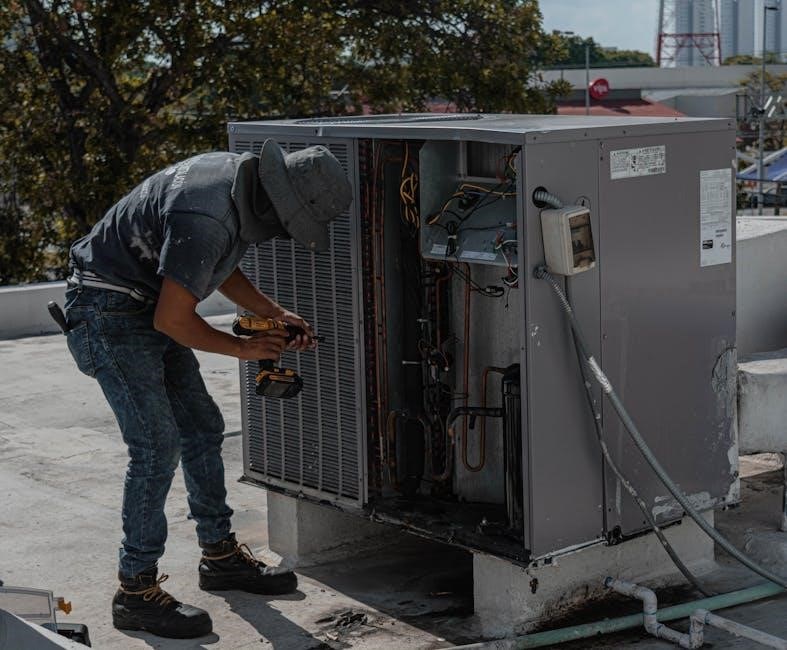
Lennox Air Conditioner Troubleshooting
Addressing issues with your Lennox air conditioner often begins with basic checks. Confirm the unit is receiving power and the thermostat is set correctly. Inspect the air filter for blockage, as a dirty filter restricts airflow and reduces cooling efficiency. Examine the outdoor unit for debris obstructing the condenser coils, hindering heat dissipation.
If these initial steps don’t resolve the problem, more complex issues may be present. Potential concerns include refrigerant leaks leading to low charge, compressor failures, or fan motor problems. These require professional diagnosis and repair due to the specialized equipment and expertise needed. A comprehensive troubleshooting guide assists technicians in pinpointing the root cause.
Unit Not Cooling – Basic Checks
When your Lennox air conditioner fails to cool, start with fundamental assessments. Verify the thermostat is set to “Cool” and the desired temperature is lower than the room temperature. Ensure the power switch to the outdoor unit is in the “On” position and no breakers have tripped. A crucial step is inspecting the air filter; a clogged filter severely restricts airflow, diminishing cooling capacity.
Next, visually inspect the outdoor condenser unit for obstructions like leaves, grass clippings, or debris blocking the fins. Clear any blockages to allow proper airflow. Confirm the fan is operating correctly. If these basic checks don’t restore cooling, further investigation by a qualified HVAC technician is recommended.
Refrigerant Leaks and Low Charge
A decrease in cooling performance often signals a refrigerant leak or low refrigerant charge within the Lennox AC system. Refrigerant is vital for heat transfer; a deficiency hinders the cooling process. Identifying leaks requires specialized equipment and training, as refrigerant is a controlled substance. Signs of a leak include ice formation on the refrigerant lines or the evaporator coil, and a hissing sound near the unit.
Attempting to recharge the system yourself is strongly discouraged due to environmental regulations and the risk of improper charging, which can damage the compressor. A qualified HVAC technician will locate and repair the leak, then accurately recharge the system to the manufacturer’s specifications, ensuring optimal cooling efficiency and preventing further damage.
Compressor Issues
The compressor is the heart of your Lennox air conditioner, responsible for circulating refrigerant. When it fails, cooling stops. Common compressor problems include overheating, electrical failures (like a burnt-out capacitor or winding), and mechanical breakdowns. A failing compressor may produce unusual noises – loud humming, clicking, or rattling – or simply fail to start.
Diagnosing compressor issues requires specialized tools and expertise. Attempting repairs yourself can be dangerous and potentially worsen the problem. A qualified HVAC technician will assess the compressor’s electrical components, check for proper voltage, and evaluate its mechanical condition. Compressor replacement is often a significant repair, and the technician will advise on whether repair or system replacement is the most cost-effective solution.
Fan Motor Problems
Lennox air conditioner fan motors circulate air across the evaporator and condenser coils, crucial for heat transfer. Issues can range from simple capacitor failures to complete motor burnout. Symptoms include a lack of airflow, unusual noises (squealing, grinding), or the fan simply not running. A failing capacitor is a common culprit, often a relatively inexpensive fix. However, a seized motor or damaged windings require motor replacement;
Troubleshooting involves checking the capacitor with a multimeter and visually inspecting the motor for physical damage. A technician will also verify proper voltage supply. Lubricating the motor bearings may temporarily resolve some noise issues, but often indicates impending failure. Always disconnect power before inspecting or working on the fan motor to prevent electrical shock. Professional diagnosis is recommended.
Lennox Heat Pump Troubleshooting
Lennox heat pumps offer both heating and cooling, making troubleshooting more complex. Common problems include insufficient heating, no cooling, or excessive cycling. Diagnosing requires understanding the reversing valve, defrost cycle, and auxiliary heat functions. A malfunctioning reversing valve prevents switching between heating and cooling modes. Defrost cycle issues, indicated by ice buildup on the outdoor unit, can stem from a faulty defrost timer or sensor.
Auxiliary heat failing means the heat pump can’t maintain temperature during very cold weather. Electrical issues, a bad thermostat, or a faulty auxiliary heat relay are potential causes. Regular maintenance, including coil cleaning and filter replacement, prevents many heat pump problems. Professional diagnosis is crucial due to the system’s complexity.
Reversing Valve Problems
The reversing valve is critical for switching between heating and cooling modes in a Lennox heat pump. A malfunctioning valve can cause the system to blow cold air when heat is needed, or vice versa. Symptoms include inconsistent temperatures and the system failing to reach the setpoint. Electrical faults, a stuck solenoid, or internal valve damage are common causes.
Diagnosing involves checking the solenoid voltage and resistance, and visually inspecting the valve for leaks or physical damage. A technician may use a multimeter to test the coil’s continuity. Replacing the reversing valve often requires recovering and recharging the refrigerant, making it a job best left to qualified professionals. Ignoring this issue leads to inefficient operation and potential compressor damage.
Defrost Cycle Issues
Lennox heat pumps utilize a defrost cycle to prevent ice buildup on the outdoor coil during heating operation. Problems arise when the cycle initiates too frequently, not at all, or runs excessively long. Frequent defrost cycles indicate a potential sensor malfunction or low refrigerant charge. A cycle that doesn’t run results in reduced heating capacity and potential coil damage from ice accumulation.
Troubleshooting involves checking the defrost timer, defrost thermostat, and outdoor temperature sensor. Technicians will verify proper voltage and resistance readings. Inspecting the coil for physical damage and ensuring proper airflow are also crucial steps. A faulty defrost control board can also cause issues. Addressing these problems ensures efficient heating and prevents costly repairs.
Auxiliary Heat Not Working
When a Lennox heat pump struggles to maintain temperature during extremely cold weather, auxiliary heat – typically electric resistance heat – should activate. If it doesn’t, several factors could be at play. A common cause is a faulty auxiliary heat relay on the control board, preventing power from reaching the heating elements. A tripped circuit breaker dedicated to the auxiliary heat is another frequent issue requiring a simple reset.
Troubleshooting includes verifying the thermostat settings are correct and calling for auxiliary heat. Technicians will check the voltage at the auxiliary heat terminals and inspect the heating elements for continuity. A malfunctioning temperature sensor can also prevent activation. Proper operation of auxiliary heat is vital for comfortable heating during severe cold snaps.
Troubleshooting Lennox Air Handlers
Lennox air handlers distribute conditioned air throughout your home, and issues can disrupt comfort. Blower motor failures are common, presenting as no airflow or inconsistent fan speeds; checking the motor capacitor and wiring is crucial. Control board problems can manifest as erratic operation or complete shutdowns, often requiring professional diagnosis and replacement;
Drainage issues, leading to water damage, frequently stem from clogged condensate drain lines. Regular cleaning with a wet/dry vacuum is preventative. Technicians will also inspect the float switch, ensuring it’s not stuck. Addressing these problems promptly protects your home and maintains efficient airflow. Proper air handler function is essential for overall HVAC system performance.
Blower Motor Failures
Blower motor failures in Lennox air handlers often present as a complete lack of airflow or inconsistent fan speeds. Initial checks involve verifying power to the motor and inspecting the capacitor – a frequent point of failure. A bulging or leaking capacitor indicates replacement is needed. Examine wiring connections for looseness or corrosion, as these can interrupt the electrical supply.
If the motor hums but doesn’t spin, the capacitor is a likely culprit. A multimeter can test the motor windings for continuity, identifying potential internal damage. Replacing a blower motor is often best left to a qualified HVAC technician, ensuring correct sizing and installation for optimal performance and safety. Ignoring this issue can lead to overheating and further system damage.
Control Board Issues
Lennox air handler control boards are the brains of the system, and failures manifest as erratic behavior, such as inconsistent fan operation, incorrect temperature readings, or a complete system shutdown. Begin by visually inspecting the board for burnt components, swollen capacitors, or damaged traces; Power cycling the system – turning it off and on – can sometimes resolve temporary glitches.
However, persistent issues usually necessitate further investigation. A multimeter can test voltage levels at various points on the board, identifying power supply problems. Control board replacement requires careful matching of part numbers to ensure compatibility. Due to the complexity of these systems, diagnosing and replacing a control board is best handled by a qualified HVAC technician to avoid further complications and ensure proper functionality.
Drainage Problems & Blockages
Lennox air handler drainage issues are frequently encountered, leading to water leaks and potential water damage. The primary cause is often a clogged condensate drain line, typically due to algae growth or debris accumulation. A wet/dry vacuum can effectively clear minor blockages from the drain line’s access point. Regularly flushing the drain line with a diluted bleach solution (following manufacturer guidelines) helps prevent future clogs.
Persistent drainage problems might indicate a cracked or damaged drain pan, requiring replacement. Inspect the area around the air handler for signs of water leakage. Ignoring drainage issues can lead to mold growth and reduced system efficiency. Professional cleaning and inspection are recommended annually to maintain optimal drainage and prevent costly repairs.
Using the Lennox Service Manual
The Lennox service manual is an invaluable resource for both homeowners and qualified technicians, offering detailed schematics, wiring diagrams, and troubleshooting procedures specific to each model. It provides comprehensive error code explanations, assisting in pinpointing the root cause of system malfunctions. Accessing the correct manual – based on your unit’s serial number – is crucial for accurate diagnosis and repair.
Digital versions are often available on the Lennox website or through authorized dealers, offering convenient search functionality. The manual details component locations, disassembly instructions, and recommended replacement parts. While helpful, remember that complex repairs should always be entrusted to a certified Lennox technician to ensure safety and maintain warranty validity.
Safety Precautions When Troubleshooting
Prioritizing safety is paramount when troubleshooting any HVAC system. Always disconnect power to the unit at the breaker box before attempting any inspection or repair to avoid electrical shock. Gas furnaces require extra caution; if you smell gas, immediately evacuate the area and contact your gas company. Never bypass safety controls like flame sensors or high-limit switches.
Refrigerant handling demands specialized training and equipment – do not attempt to handle refrigerant yourself, as it can cause frostbite and environmental damage. Wear appropriate personal protective equipment, including gloves and eye protection. If unsure about any procedure, consult a qualified Lennox technician. Improper repairs can lead to system damage, fire hazards, or carbon monoxide poisoning.
Finding a Qualified Lennox Technician
Locating a certified Lennox technician is crucial for complex repairs or when you’re uncomfortable performing DIY troubleshooting. Lennox maintains a network of Premier Dealers who have demonstrated expertise in installation, maintenance, and repair of Lennox equipment. Utilize the Lennox website’s “Find a Dealer” tool to locate authorized professionals in your area.
Verify the technician’s credentials and ensure they possess the necessary licenses and insurance. Ask for references and check online reviews to gauge their reputation. A qualified technician will accurately diagnose the problem, provide a transparent cost estimate, and utilize genuine Lennox parts. Don’t hesitate to obtain multiple quotes before committing to a repair, ensuring a fair and reliable service experience.