
Bobcat Troubleshooting Manual: A Comprehensive Guide
This manual offers detailed service information, covering adjustments, diagnostics, disassembly, repair, and reassembly procedures for Bobcat machinery.
Access essential PDF workshop manuals and resources, including those for specific models like the 773 G Series, ensuring optimal performance.
Prior to operation or service, thoroughly review the Operation & Maintenance Manual and operator’s handbook for safe and effective use.
Bobcat equipment, renowned for its versatility, requires a systematic approach to troubleshooting for maintaining peak operational efficiency. This section introduces fundamental principles for diagnosing and resolving common issues, emphasizing safety as paramount. Effective troubleshooting minimizes downtime and costly repairs, extending the lifespan of your machine.
Understanding the interconnectedness of Bobcat’s systems – engine, hydraulics, electrical, and operational – is crucial. A seemingly simple problem can often stem from a more complex underlying cause. Utilizing service manuals and diagnostic software, as highlighted in available resources, provides detailed insights into specific model functionalities.
Regular maintenance, detailed in the Operation & Maintenance Manual, is preventative troubleshooting. Proactive fluid level checks, filter replacements, and adherence to maintenance schedules significantly reduce the likelihood of unexpected breakdowns. This introduction sets the stage for a comprehensive exploration of specific troubleshooting areas, empowering operators and technicians alike.
Understanding Bobcat Models & Serial Numbers
Accurate identification of your Bobcat model and its serial number is fundamental for effective troubleshooting and obtaining the correct parts or service information. Bobcat utilizes a complex system of model designations and serial number sequences to pinpoint specific machine configurations.
Serial numbers often indicate the manufacturing date and any engineering revisions applied to that particular unit. This is critical when referencing workshop manuals, as procedures can vary significantly between model years or even minor revisions within a series, like the 773 G Series mentioned in available resources.
Locating the serial number plate is the first step. It’s typically found on the machine’s frame, often near the operator’s station. Correctly identifying your machine ensures you’re using the appropriate diagnostic steps and replacement parts, preventing further complications and maximizing repair accuracy. Always consult official Bobcat documentation for precise location details;
Essential Tools for Bobcat Repair
Successful Bobcat repair demands a well-equipped toolkit extending beyond basic hand tools. A comprehensive set of wrenches, sockets, and screwdrivers is foundational, alongside specialized tools for hydraulic systems, like pressure gauges and hose crimpers.
Diagnostic equipment is increasingly vital. Multimeters are essential for electrical system checks, while Bobcat-specific diagnostic software (mentioned in resources) allows for deeper system analysis and fault code retrieval. Torque wrenches are crucial for ensuring proper fastener tightening, preventing damage and maintaining safety.
Safety gear is non-negotiable: safety glasses, gloves, and appropriate footwear are paramount. Having a reliable lifting device, such as a jack or hoist, is also beneficial for component removal and installation. Investing in quality tools streamlines repairs and minimizes downtime, ensuring efficient and effective maintenance.
Engine Troubleshooting
Addressing engine issues requires systematic diagnosis, covering starting failures, power loss, overheating, and fuel system problems for optimal Bobcat performance.
Engine Won’t Start – Common Causes
When a Bobcat engine fails to start, several factors could be at play, demanding a methodical approach to diagnosis. A depleted or faulty battery is a frequent culprit, hindering the starter motor’s ability to crank the engine effectively. Inspect battery terminals for corrosion and ensure a full charge.
Next, examine the starting system itself, focusing on the solenoid and starter motor. A malfunctioning solenoid may prevent power from reaching the starter, while a worn-out starter motor simply won’t engage. Fuel delivery problems are also common; check the fuel level, fuel lines for obstructions, and the fuel pump’s operation.
Furthermore, investigate potential ignition issues. A faulty ignition switch, a defective ignition coil, or a damaged wiring harness can all prevent the engine from firing. Finally, don’t overlook simpler issues like a clogged air filter or a faulty safety interlock switch, which can prevent the engine from starting as a safety precaution. Systematic checking of these components will pinpoint the root cause.
Low Engine Power – Diagnosis & Solutions
Experiencing reduced engine power in your Bobcat can significantly impact productivity. Initial diagnosis should focus on the air intake system; a clogged air filter restricts airflow, leading to incomplete combustion and power loss. Inspect and replace the air filter as needed.
Fuel system issues are another common cause. Check for fuel line restrictions, a failing fuel pump, or dirty fuel injectors. Consider adding a fuel stabilizer to address potential fuel quality problems. Additionally, examine the exhaust system for blockages, such as a clogged muffler or catalytic converter, which can hinder exhaust flow.
Engine mechanical problems, like low compression due to worn piston rings or valves, can also contribute to power loss. A compression test can help identify these issues. Finally, verify the engine’s governor is functioning correctly, as a malfunctioning governor can limit engine speed and power output.
Engine Overheating – Identifying the Problem
Engine overheating in a Bobcat demands immediate attention to prevent severe damage. The cooling system is the primary area of investigation. Begin by checking the coolant level; a low level is a frequent culprit. Inspect the radiator for external blockages like debris or bent fins, hindering heat dissipation.
A faulty thermostat can prevent coolant circulation, leading to rapid overheating. Test or replace the thermostat as necessary. Examine the water pump for leaks or impeller damage, ensuring adequate coolant flow. Also, check the radiator cap for proper sealing; a faulty cap lowers the system’s boiling point.
Internal engine issues, such as a blown head gasket, can introduce combustion gases into the cooling system, causing overheating. Look for bubbles in the coolant reservoir or white smoke from the exhaust. Finally, verify the fan and fan clutch are operating correctly, providing sufficient airflow across the radiator.
Fuel System Issues – Troubleshooting Guide
Fuel system problems can manifest as hard starting, reduced power, or complete engine failure in a Bobcat. Start by inspecting the fuel tank for contamination – water or debris can severely impact performance. Check the fuel lines for kinks, leaks, or blockages, restricting fuel flow to the engine.
A clogged fuel filter is a common issue; replace it according to the maintenance schedule. Examine the fuel pump for proper operation, verifying it delivers adequate pressure to the fuel rail. Inspect the fuel injectors for clogging or malfunction, hindering efficient fuel atomization.
Consider the possibility of air in the fuel lines, especially after fuel system maintenance. Bleed the fuel lines to remove any trapped air. Finally, diagnose potential issues with the fuel pressure regulator, ensuring consistent fuel delivery.

Hydraulic System Troubleshooting
Address leaks promptly, diagnose power loss, inspect cylinders for issues, and systematically troubleshoot the hydraulic pump for optimal Bobcat function.

Hydraulic System Leaks – Detection & Repair
Identifying the source of hydraulic leaks is crucial for effective repair. Begin by visually inspecting all hydraulic lines, hoses, fittings, and the pump itself for any signs of fluid accumulation or dampness. Pay close attention to connection points, as these are common leak locations.
To pinpoint smaller leaks, use a clean piece of cardboard or a white cloth to trace the fluid back to its origin. Once located, tighten any loose fittings. If tightening doesn’t resolve the issue, replace the damaged hose or fitting. For cylinder leaks, inspect the seals and rods; replacement may be necessary.
Always relieve hydraulic pressure before disconnecting any lines. When replacing components, ensure they meet Bobcat’s specifications. After repairs, thoroughly test the system to confirm the leak is eliminated and hydraulic pressure is stable. Remember to properly dispose of any spilled hydraulic fluid according to environmental regulations.
Loss of Hydraulic Power – Possible Causes
A sudden loss of hydraulic power in a Bobcat can stem from several issues. A primary suspect is a low hydraulic fluid level, often caused by leaks. Check the reservoir and top up as needed, but address the leak source simultaneously. A failing hydraulic pump is another common culprit, exhibiting reduced output pressure.
Clogged or restricted hydraulic filters can significantly impede flow, leading to power loss. Inspect and replace filters according to the maintenance schedule. A faulty relief valve can also cause a pressure drop, preventing proper operation. Inspect the valve for damage or malfunction.
Furthermore, internal leaks within the hydraulic cylinders or control valves can diminish overall system power. Thoroughly examine these components for wear or damage. Always prioritize safety by relieving pressure before inspecting the hydraulic system.
Hydraulic Cylinder Issues – Diagnosis & Fixes
Diagnosing hydraulic cylinder problems begins with visual inspection for external leaks around the seals, rod, and end caps. Internal leaks manifest as slow or erratic movement, even with sufficient hydraulic pressure. Check the cylinder rod for scoring or damage, which compromises the seal’s integrity.
To test for internal leakage, extend the cylinder fully and monitor for any pressure drop over time. If detected, the cylinder likely requires rebuilding or replacement. Worn piston seals or O-rings are frequent causes of internal leakage. Disassembly allows for inspection and replacement of these components.
Always ensure the cylinder is fully retracted before disconnecting hydraulic lines to prevent uncontrolled movement. Proper lubrication during reassembly is crucial for smooth operation and extended cylinder life. Prioritize safety and consult the service manual for specific procedures.
Hydraulic Pump Troubleshooting – A Step-by-Step Approach
Begin by verifying the hydraulic fluid level and condition; low fluid or contamination drastically reduces pump performance. Next, listen for unusual noises – whining, grinding, or pulsing – indicating internal wear or cavitation. Check the pump’s inlet line for restrictions or collapses, hindering fluid intake.
Measure the pump’s output pressure using a gauge; low pressure suggests internal leakage or a worn pump. Inspect the pump’s drive coupling for damage or slippage, ensuring proper power transfer. If the pump is gear-type, examine the gears for wear or breakage.
For vane pumps, check the vanes for wear and the cam ring for scoring. Always consult the Bobcat service manual for specific pump models and troubleshooting procedures. Replacement may be necessary if internal damage is extensive.

Electrical System Troubleshooting
Diagnose issues with batteries, starting systems, wiring harnesses, and sensors using testing and calibration methods. Repair damaged components.
Address solenoid and motor problems, ensuring proper functionality for optimal machine operation and safety.
Battery Issues – Testing & Replacement
Addressing battery problems is crucial for reliable Bobcat operation. Begin with a visual inspection, checking for corrosion around terminals and any physical damage to the battery case. Utilize a multimeter to test the battery’s voltage; a fully charged 12-volt battery should read approximately 12.6 volts. Perform a load test to assess the battery’s ability to deliver consistent power under demand – a significant voltage drop indicates a failing battery.
If the battery fails these tests, replacement is necessary. Always disconnect the negative terminal first to prevent short circuits. Ensure the replacement battery matches the original specifications (voltage, cold cranking amps – CCA). Clean the battery terminals and cable connectors before installation. Properly dispose of the old battery according to local regulations. After installation, verify the charging system is functioning correctly to prevent premature battery failure.
Starting System Problems – Solenoids & Motors
Diagnosing starting system issues often centers on the solenoid and starter motor. A common symptom is a “click” sound when attempting to start, indicating the solenoid is engaging but the motor isn’t turning. Test the solenoid by applying direct power – if it doesn’t engage, replacement is needed. Check the wiring connections to both the solenoid and starter motor for corrosion or looseness.
The starter motor itself can fail due to worn brushes or a faulty armature. Use a multimeter to check for continuity within the motor windings. If there’s no continuity, the motor requires replacement. Ensure proper grounding between the engine block and the starter motor; a poor ground can prevent sufficient current flow. Always disconnect the battery before working on the starting system to avoid electrical shock.
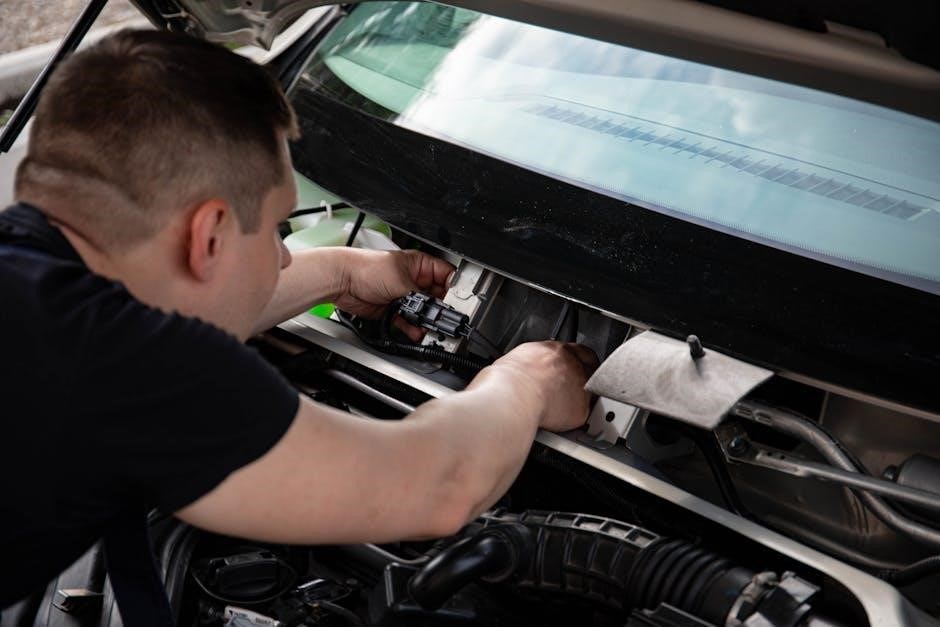
Wiring Harness Damage – Inspection & Repair
Thoroughly inspect the Bobcat’s wiring harness for signs of damage, including chafing, cracking, or exposed wires. Pay close attention to areas where the harness routes near moving parts or sharp edges. Use a multimeter to check for continuity in each wire, identifying breaks or shorts. Visual inspection alone isn’t always sufficient; wires can be damaged internally.
Repairing damaged wiring requires careful attention to detail. Damaged sections should be replaced with wire of the same gauge and insulation type. Use proper crimping tools and heat-shrink tubing to ensure secure and weatherproof connections. Avoid simply taping damaged wires, as this is a temporary fix. Document all repairs for future reference, and always disconnect the battery before commencing any electrical work.
Sensor Malfunctions – Diagnosis & Calibration
Diagnosing sensor malfunctions requires a systematic approach. Begin by checking for obvious physical damage to the sensor and its wiring. Utilize Bobcat’s diagnostic software to read sensor data and identify any out-of-range values or error codes. Compare the readings to the manufacturer’s specifications to confirm a malfunction. A faulty sensor can trigger a cascade of issues, impacting machine performance.
Calibration is often necessary after replacing a sensor or repairing wiring. Follow the procedures outlined in the service manual, using the diagnostic software to input the correct parameters. Improper calibration can lead to inaccurate readings and continued operational problems. Ensure the machine is on a level surface and operating at the correct temperature during calibration for optimal results.
Operational Troubleshooting

Address issues with attachments, drive systems, operator controls, and safety features; ensuring compatibility and proper function for peak performance and safety.
Attachment Issues – Compatibility & Operation
Troubleshooting attachment problems begins with verifying compatibility; ensure the attachment is designed for your specific Bobcat model and series. Refer to the Bobcat documentation to confirm proper specifications and load limits. Incorrectly matched attachments can lead to operational failures and potential safety hazards.
Operational issues often stem from improper connection or securing of the attachment. Always follow the manufacturer’s instructions for attachment mounting and locking mechanisms. Inspect hydraulic lines and electrical connections for damage or disconnections. Verify that all pins and locking devices are correctly installed and secured before operation.
If an attachment isn’t functioning as expected, check the hydraulic flow and pressure settings. Some attachments require specific flow rates to operate correctly. Consult the attachment’s manual for recommended settings. Additionally, examine the attachment’s control levers and switches for proper functionality. A malfunctioning control system can prevent the attachment from operating effectively. Remember the Bobcat loader must be equipped with safety items.
Drive System Problems – Traction & Control
Addressing drive system issues starts with assessing traction loss. Check tire pressure, ensuring it matches the Bobcat model’s specifications. Uneven or incorrect tire pressure significantly impacts traction. Inspect tires for wear and damage, replacing them if necessary. Consider ground conditions; slippery surfaces require caution and potentially tire chains.
Control problems, such as unresponsive steering or erratic movement, often indicate hydraulic or mechanical issues. Examine hydraulic lines and fluid levels, looking for leaks or low fluid. Inspect the drive motors and transmissions for damage or wear. Verify the functionality of the travel pedals and joystick controls.
Furthermore, investigate potential issues with the drive system’s sensors and control modules. A malfunctioning sensor can send incorrect signals, leading to erratic operation. Consult the Bobcat diagnostic software for error codes and troubleshooting guidance. Always prioritize safety when diagnosing and repairing drive system components.
Operator Control Issues – Joystick & Pedals
Troubleshooting operator control problems begins with a thorough inspection of the joystick and pedal mechanisms. Check for physical obstructions or damage that may hinder movement. Verify that the joystick and pedals are returning to their neutral positions smoothly and consistently. Inspect the linkages and connections for looseness or wear.
Hydraulic issues are frequently the root cause of control problems. Examine hydraulic lines and fittings for leaks, and ensure adequate hydraulic fluid levels. A faulty hydraulic valve can also cause unresponsive or erratic control. Consider the possibility of air in the hydraulic system.
Electrical malfunctions can also affect control functionality. Inspect wiring harnesses and connectors for damage or corrosion. Utilize Bobcat diagnostic software to scan for error codes related to the control system. Remember to consult the operator’s manual for specific troubleshooting steps and safety precautions.

Safety System Malfunctions – Emergency Stops & Alarms
Addressing safety system issues is paramount. Begin by verifying the functionality of all emergency stop buttons; ensure they immediately halt machine operation. Investigate any alarm systems that activate unexpectedly or fail to sound when needed. Check wiring connections and power supplies to these critical components.
Faulty sensors are a common cause of alarm malfunctions. Utilize Bobcat diagnostic software to identify specific sensor failures and error codes. Inspect sensor mounting and alignment, as improper positioning can trigger false alarms.

Review the operator’s manual for a comprehensive list of alarms and their corresponding troubleshooting procedures. Never disable or bypass safety systems; prioritize repairs to maintain a safe operating environment. Regular inspection and testing of these systems are crucial preventative measures.

Maintenance & Preventative Troubleshooting
Regular schedules, fluid checks, and filter replacements are vital for avoiding problems. Utilize Bobcat diagnostic software for proactive monitoring and early issue detection.
Regular Maintenance Schedules – Avoiding Problems

Implementing a consistent maintenance schedule is paramount to preventing costly repairs and maximizing the lifespan of your Bobcat equipment. Adhering to the manufacturer’s recommended intervals, detailed in the Operation & Maintenance Manual, ensures optimal performance and minimizes downtime. These schedules encompass a range of tasks, from daily checks – like inspecting fluid levels and looking for visible leaks – to more comprehensive servicing performed at specified hour intervals.
Proactive maintenance includes regular inspections of critical components such as filters (air, fuel, and hydraulic), hoses, belts, and tires. Timely replacement of worn parts prevents cascading failures and maintains operational efficiency. Neglecting these schedules can lead to increased wear and tear, reduced productivity, and potentially hazardous situations. Remember, preventative maintenance is significantly more cost-effective than reactive repairs, safeguarding your investment and ensuring reliable operation.
Always consult the specific manual for your Bobcat model, as maintenance requirements vary based on usage and operating conditions.
Fluid Level Checks – Importance & Procedures
Maintaining correct fluid levels is crucial for the smooth operation and longevity of your Bobcat machine. Insufficient fluid can lead to component damage, overheating, and reduced performance, while overfilling can cause leaks and inefficient operation. Regular checks should be incorporated into your daily or pre-operation routine, as outlined in the Operation & Maintenance Manual.
Procedures involve parking the machine on a level surface, allowing it to cool down, and then carefully inspecting the levels of engine oil, hydraulic fluid, coolant, and fuel. Utilize the dipsticks or sight glasses provided, ensuring they are clean before taking readings. Note any discrepancies and top up fluids to the recommended levels using the correct type specified in the manual.
Consistent monitoring and timely fluid replenishment are vital preventative measures, minimizing the risk of costly repairs and maximizing uptime. Always prioritize safety when checking and adding fluids.
Filter Replacement – Air, Fuel, & Hydraulic
Regular filter replacement is a cornerstone of preventative maintenance for your Bobcat, safeguarding critical components from contaminants. Dirty filters restrict flow, reduce efficiency, and accelerate wear. The air filter prevents abrasive particles from entering the engine, while the fuel filter protects the fuel system from debris. Hydraulic filters maintain the cleanliness of the hydraulic fluid, ensuring optimal performance of hydraulic components.
Procedures involve identifying the correct filter type for your specific model (refer to the manual), safely draining any associated fluids, and removing the old filter. Before installing the new filter, lightly lubricate the gasket with clean oil. Tighten to the manufacturer’s specified torque.
Adhering to the recommended replacement intervals outlined in the Operation & Maintenance Manual is essential for preventing costly repairs and maximizing machine lifespan.
Using Bobcat Diagnostic Software
Bobcat diagnostic software provides a powerful tool for pinpointing issues and optimizing machine performance. This software interfaces with the machine’s electronic control unit (ECU), allowing technicians to read diagnostic trouble codes (DTCs) and access real-time data.
Capabilities include monitoring sensor readings, performing component tests, and calibrating various systems. Utilizing this software can significantly reduce troubleshooting time and improve accuracy compared to traditional methods. It often requires a specific data link adapter to connect to the machine’s diagnostic port.
Proper training and understanding of the software interface are crucial for effective use. Always refer to the software’s documentation and the Bobcat service manual for detailed instructions and safety precautions.