
Craftsman 1/2 HP Garage Door Opener Troubleshooting Guide

Considering a 20-year-old opener? Focus on door mechanics and springs; replacement might be wiser due to modern, quieter, and feature-rich options available for around $200․
Understanding Your Craftsman Opener
Craftsman 1/2 HP openers, while reliable, benefit from understanding their limitations, especially with age․ After two decades, components wear, making simple fixes less effective than a full replacement․ Modern openers offer significant upgrades – quieter operation, Wi-Fi connectivity for remote monitoring, and battery backups for power outages․
Before troubleshooting, assess the door itself․ Ensure smooth track travel and properly functioning springs; spring issues demand professional attention due to inherent dangers․ A new opener, costing $100-$200, provides enhanced features and peace of mind, often proving a more sensible long-term investment than repeated repairs․
Safety Precautions
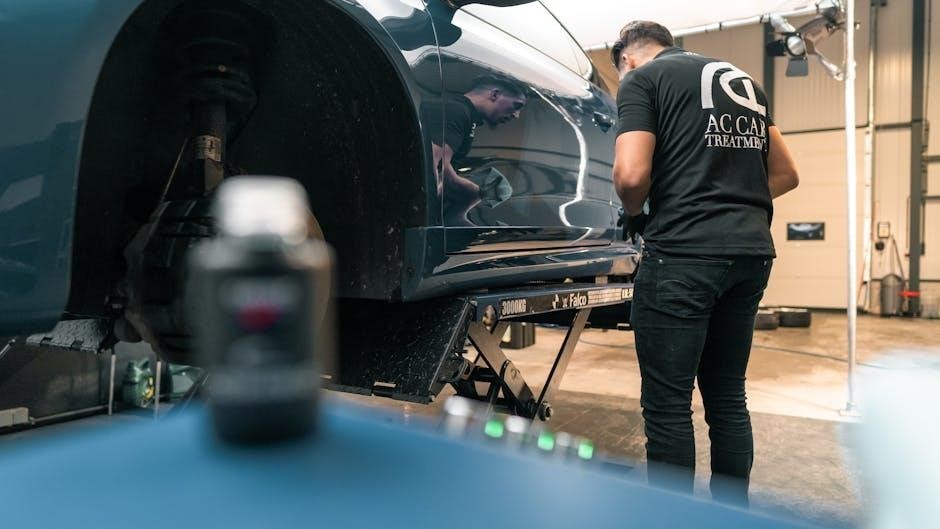
Garage door spring systems are extremely dangerous and should only be inspected or repaired by qualified professionals․ Incorrect handling can lead to severe injury or even death․ Always disconnect the power to the opener before performing any maintenance or troubleshooting․
If you choose to work on the opener yourself, wear appropriate safety glasses and gloves․ Ensure the door is securely supported before removing any components․ Never attempt to modify or disable safety features․ Remember, a malfunctioning opener can pose a significant risk; prioritize safety above all else during any inspection or repair process․
Common Problems & Initial Checks
Begin by verifying the door’s smooth operation on the tracks – any binding suggests a door issue, not necessarily an opener fault․ Inspect the springs for proper assistance; if they seem weak or damaged, immediately consult a professional․ Confirm the power supply is functioning correctly, checking for tripped breakers or loose connections․

Next, test the remote control batteries and ensure there’s no interference․ A simple visual inspection for obvious damage to the opener unit itself is also crucial before diving into more complex troubleshooting steps․

Power Supply Issues
Start with the basics: check the garage door opener’s power cord to ensure it’s securely plugged into a working outlet․ Verify the circuit breaker hasn’t tripped; a simple reset can often resolve the issue․ Test the outlet with another device to confirm it’s delivering power․ If using an extension cord, ensure it’s heavy-duty and suitable for the opener’s amperage․
Inspect the wiring for any visible damage or loose connections․ A faulty electrical outlet or a tripped breaker are the most common causes of power failures, so address these first․
Remote Control Problems
Begin by replacing the remote’s batteries with fresh ones; this is the simplest fix․ If that doesn’t work, try reprogramming the remote to the garage door opener․ Consult your opener’s manual for the specific programming steps, as they vary by model․ Ensure there’s no interference from other wireless devices, like baby monitors or routers․
Check if the antenna wire on the opener unit is securely connected and not damaged․ A weak signal or interference can prevent the remote from functioning correctly․ Test with a known working remote if available․
Troubleshooting the Motor
If the motor hums but doesn’t run, suspect an overheating issue․ Allow the motor to cool down for 15-30 minutes and try again․ Repeated overheating suggests a more significant problem․ Inspect the motor brushes for wear; worn brushes cause intermittent operation and eventual failure․ Replacing them is a relatively inexpensive repair․
Listen for unusual noises like grinding or squealing, which could indicate internal motor damage․ If the motor runs but lacks power, a capacitor issue might be the cause, requiring professional diagnosis and repair․
Overheating Motor
An overheating motor often indicates a strain on the system․ First, ensure the garage door moves freely – obstructions or binding will force the motor to work harder․ Check the door’s balance; improperly adjusted springs significantly increase motor load․ If the motor cycles on and off rapidly, or shuts down completely with a humming sound, overheating is likely․
Allow the motor to cool completely before attempting further operation; Repeated overheating suggests a deeper issue, potentially within the motor itself, requiring professional inspection or opener replacement․
Worn Motor Brushes
Worn motor brushes create friction, reducing motor efficiency and potentially causing sparking․ While less common in newer models, older Craftsman openers utilize brushes that degrade over time with use․ Symptoms include intermittent operation, a burning smell, or visible sparking within the motor housing (exercise extreme caution!)․
Replacing brushes is possible, but requires disassembly and knowledge of your specific model․ Given the age of many Craftsman openers, and the availability of affordable replacements, consider if brush replacement is cost-effective compared to a new unit․
Chain and Sprocket Issues
Chain and sprocket problems often manifest as binding or jerky door movement․ Inspect the chain for slack; adjust tension if needed, ensuring it isn’t overly tight, which strains the motor․ A binding chain, especially after spring replacement, suggests misalignment or wear․ Examine the sprocket teeth for wear – rounded or missing teeth necessitate replacement․
Moving the chain one space on the sprocket can sometimes resolve binding issues․ Remember that a worn chain or sprocket impacts the opener’s efficiency and can lead to motor strain, potentially shortening its lifespan․
Chain Slack & Adjustment
Excessive chain slack causes jerky movements and reduces lifting power․ Begin by visually inspecting the chain for looseness; a slight sag is normal, but significant droop requires adjustment․ Most Craftsman openers have adjustment points near the motor or chain rail․ Tighten the chain incrementally, checking door operation after each adjustment․
Avoid over-tightening, as this strains the motor and can damage the chain or sprocket․ A properly adjusted chain should have minimal sag but move freely without binding․ Regularly check chain tension, especially after initial adjustments, to maintain smooth operation․

Sprocket Wear & Replacement
A worn sprocket causes chain slippage, noise, and reduced lifting capacity․ Inspect the sprocket teeth for rounding, chipping, or excessive wear; these indicate the need for replacement․ Replacement sprockets are relatively inexpensive and readily available․ Disconnect the power before attempting any repairs!
Removing the old sprocket usually involves loosening a set screw or clip․ Install the new sprocket, ensuring proper alignment with the chain․ After replacement, re-adjust the chain tension as described previously․ Regularly inspect the sprocket alongside the chain for optimal performance and longevity․
Limit Switch Adjustments
Limit switches define the garage door’s open and closed travel range․ Incorrectly adjusted limits can cause the door to not fully open or close, or to reverse unexpectedly․ Identifying problems involves observing the door’s movement and noting where it stops relative to the desired positions․
Adjustment screws on the limit switches control the travel․ Small adjustments are key; incrementally change the settings and test the door’s operation after each adjustment․ Be cautious not to over-tighten, which can damage the switches․ Proper limit switch settings are crucial for safe and reliable operation․
Identifying Limit Switch Problems
Diagnosing limit switch issues starts with observation․ Does the door stop short of fully opening or closing? Does it immediately reverse direction? These are key indicators․ Listen for unusual clicking sounds from the switches during operation, suggesting potential mechanical failure․ Visually inspect the switches for any obvious damage, like cracks or loose wiring․
Test the switches using a multimeter if you’re comfortable; continuity should change as the door reaches its limits․ If the door behaves erratically, or the switches appear damaged, they likely need adjustment or replacement to restore proper function․
Adjusting Travel Limits
Carefully adjust travel limits to ensure full door operation․ Locate the limit adjustment screws on your Craftsman opener – typically small dials․ Small adjustments are crucial; begin with minor turns in the desired direction (up or down)․ Test the door’s movement after each adjustment, observing if it reaches the desired fully open and fully closed positions․
Avoid over-tightening, as this can strain the motor․ If the door reverses prematurely, slightly loosen the down-travel limit․ If it doesn’t fully close, tighten it․ Repeat until smooth, complete operation is achieved․
Force Setting Adjustments
Proper force settings are vital for safety and smooth operation․ These settings dictate how much power the opener uses to overcome resistance during door movement․ Locate the up and down force adjustment dials – usually near the limit switches․ Start with the lowest settings and incrementally increase them until the door operates reliably without struggling․
Excessive force can be dangerous, potentially causing damage or injury․ Regularly check these settings, especially after any adjustments to the door’s balance or track alignment, ensuring optimal performance and safety․
Understanding Force Settings
Force settings control the power applied during closing and opening․ They aren’t about how fast the door moves, but how hard the opener pushes against resistance․ Too little force, and the door may reverse unnecessarily․ Too much, and it could override safety mechanisms or damage the door․
Modern openers often have separate adjustments for up and down force․ Regularly testing and fine-tuning these settings is crucial for safe and reliable operation, preventing potential issues and ensuring the door responds correctly to obstructions․
Adjusting Up and Down Force
Carefully adjust force settings using the opener’s control panel․ Start with the lowest setting and incrementally increase it until the door fully opens and closes without reversing unexpectedly․ Test the door’s response to a slight obstruction – it should stop and reverse direction․
Avoid excessive force; it can compromise safety features․ If adjustments don’t resolve issues, or the door struggles significantly, investigate mechanical problems like binding or spring imbalances before increasing force further․ Prioritize safety and proper function․
Gear and Worm Gear Inspection
Begin by visually inspecting the gears within the opener unit․ Look for any signs of stripped or broken teeth on both the gear and worm gear – a common failure point․ If damage is present, replacement is necessary․ Even without visible damage, check for excessive wear or grinding noises during operation․
Apply lithium-based grease to lubricate the gears, ensuring smooth engagement․ Proper lubrication reduces friction and extends the lifespan of these critical components․ If gears appear fine but the opener still malfunctions, further investigation is needed․
Checking for Stripped Gears
A primary step involves a thorough visual examination of the opener’s gears․ Carefully inspect each tooth on both the drive and worm gear for any signs of missing pieces, rounding, or cracking․ Stripped gears often manifest as a grinding noise during operation, or the door simply won’t move․
Manually rotate the gears to feel for resistance or clicking sounds, indicating damage․ If stripping is confirmed, replacement of the affected gear(s) is essential․ Ignoring this issue can lead to complete opener failure and potentially damage other components․
Lubrication of Gears
Proper lubrication is crucial for smooth operation and longevity of your Craftsman opener’s gears․ After inspecting for damage, apply a silicone-based grease specifically designed for garage door openers․ Avoid using petroleum-based products, as they can attract dust and grime, worsening wear․
Apply the grease sparingly to the gear teeth, ensuring even distribution․ This reduces friction, minimizes noise, and prevents premature wear․ Regular lubrication – ideally twice a year – can significantly extend the life of your opener and maintain optimal performance․
Spring System Considerations (Professional Help Recommended)
Garage door springs are under extreme tension and pose a serious safety risk․ Attempting DIY spring repair without proper knowledge and tools can lead to severe injury or even death․ If you suspect spring issues – visible damage, uneven door movement, or difficulty lifting – immediately contact a qualified professional․
Ensure the technician installs safety wires through the springs during replacement․ These wires contain the spring if it breaks, preventing uncontrolled release of energy․ Replacing springs alongside the opener is advisable for comprehensive maintenance and safety․
Spring Inspection & Safety
Never attempt to inspect or repair garage door springs yourself unless you are a trained professional․ Springs store immense energy, and a sudden release can cause catastrophic injury․ Visually check for signs of corrosion, gaps, or distortion in the springs․ Uneven door operation or a noticeable struggle to lift the door are red flags․
Crucially, ensure any replacement springs have safety cables running through them․ These cables prevent the spring from whipping around if it breaks, significantly reducing the risk of harm․ Prioritize professional assistance for spring-related issues; your safety is paramount․
Upgrading vs․ Repairing (Cost Analysis)
For a 20-year-old Craftsman opener, carefully weigh repair costs against replacement․ While basic openers start around $100-$150, a Wi-Fi enabled model with battery backup offers significant benefits for approximately $200․ Consider the potential for further repairs on an aging unit․ Upgrading provides quieter operation, smart features like remote monitoring, and increased reliability․
Factor in the cost of professional spring replacement if needed, as this is not a DIY task․ A new opener often includes improved safety features and a warranty, offering long-term value․ A modest investment can yield substantial improvements․
Benefits of a New Opener
Modern garage door openers deliver substantial improvements over older models․ Expect significantly quieter operation, reducing noise pollution for you and your neighbors․ Wi-Fi connectivity allows remote control and monitoring via smartphone, providing convenience and security – check door status and receive alerts․ Battery backup ensures functionality during power outages, a crucial feature for accessibility․
New openers are also physically smaller and easier to install, potentially saving on professional labor costs․ Enhanced safety features and improved reliability contribute to peace of mind and reduced long-term maintenance․
Cost Comparison: Repair vs․ Replace
For a 20-year-old Craftsman opener, carefully weigh repair costs against replacement․ Basic replacement openers start around $100-$150, while Wi-Fi enabled models are approximately $200․ Professional spring replacement, if needed, adds significant expense and complexity․ If the door itself is sound, a full replacement often proves more economical․
Consider the long-term value: a new opener offers improved reliability, features, and potentially lower energy consumption․ Factor in the time investment for repairs versus the relatively straightforward installation of a new unit, especially with assistance․